Anodising is an electrochemical process that converts metal surfaces into a durable, decorative, and highly corrosion-resistant anodic oxide finish.
What is anodising?
Anodising is an electrochemical process which converts a metal surface into a durable, decorative, and highly corrosion-resistant anodic oxide finish. An electric current passing through the metal part immersed in an electrolyte solution creates the anodic oxide surface.
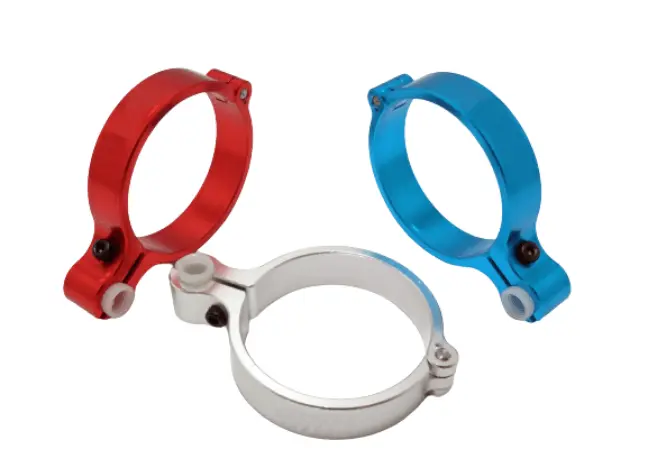
Although non-ferrous metals such as titanium and magnesium can be anodised, aluminium alloys are better suited and are the most commonly anodised material. The electrochemical process causes a thick layer of aluminium oxide to form on the part’s surface.
Hence, the article is written about the anodising process of aluminium. Most of the process characteristics, steps and chemicals are the same for other materials.
Types of Anodising
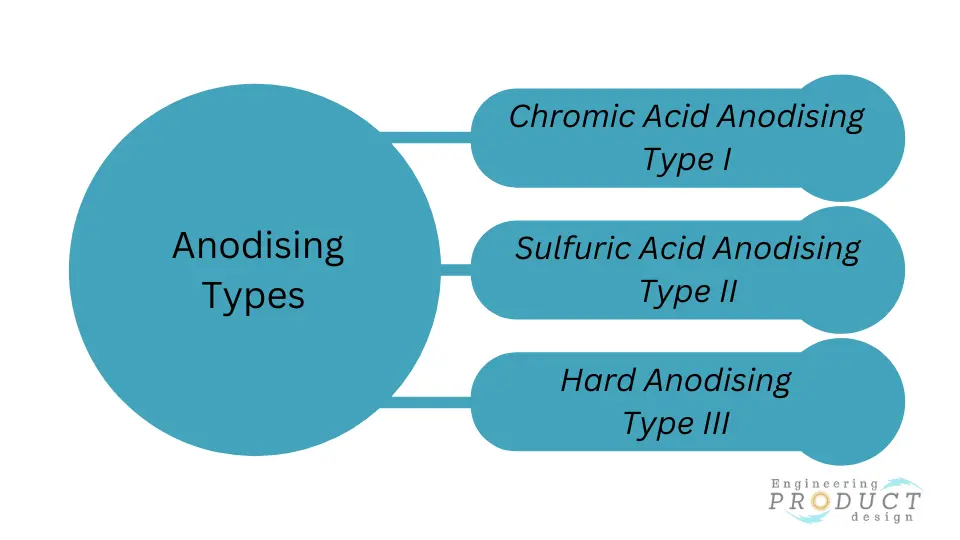
There are three main types used in the product design industry. They are as follows;
- Chromic Acid Anodising (CAA) – Type I
- Sulfuric Acid Anodising (SAA) – Type II
- Hard Anodising(HA) – Type III
Quick comparison of three types
| Aspect | Chromic Acid Anodising (CAA) | Sulfuric Acid Anodising (SAA) | Hard Anodising (HA) |
| Pros | |||
| Corrosion Resistance | Offers moderate corrosion resistance | Provides good corrosion resistance | Provides excellent corrosion resistance |
| Electrical Insulation | Effective electrical insulator | Functions as an electrical insulator | Good electrical insulator |
| Dimensional Stability | Minimal impact on dimensions | Limited dimensional changes | May cause slight dimensional changes |
| Cons | |||
| Environmental Impact | Involves highly toxic chromic acid | Less environmentally friendly | Requires higher electrical input |
| Regulatory Restrictions | Faces stringent regulations | Subject to environmental regulations | Subject to environmental regulations |
| Color Options | Limited color choices | Offers a wide range of color options | Limited color choices |
Chromic Acid Anodising – Type I
Chromic Acid Anodising produces a thin, transparent anodic oxide layer that is highly corrosion-resistant. Product designers typically use this anodising on aircraft parts, automotive components, and other applications where durability is essential.
Chromic acid anodising, known as type I anodise, produces the thinnest coating among the three primary types, typically ranging from .00002″ to .0001″ per surface (20 to 100 microinches). Despite its thinness, chromic anodise offers aluminium comparable corrosion protection to thicker sulfuric and hard coat anodise varieties when adequately sealed.
Chromic anodising differs from other techniques because it exhibits a greyer colouration and has a lower capacity to absorb dyes due to its thinner nature. Consequently, its decorative applications are limited. However, it can be dyed black for non-reflective, protective coatings on optical component housings. Even when dyed black, chromic anodising maintains a lighter appearance than conventional sulfuric black anodises. However, achieving black dye incorporation in chromic anodise requires raising the temperature of the chromic acid, making this process less common and necessitating specific scheduling.
Chromic acid anodising characteristics
- Suitable for welded parts and assemblies
- Maintains tight tolerances without altering dimensions
- Good for applications where bonding is required
- Non-conductive surface
- Suitable for welded parts and assemblies
- It can be dyed black, though other colours are not feasible
Chromic acid anodising applications
- Welded components and assemblies.
- Typically, designers use this as a base for painting or priming.
- Precision machined components, especially for aerospace components.
Sulfuric Acid Anodising (SAA) – Type II
Anodising using Sulfuric acid produces a thicker anodic oxide layer than type I anodising. Sulfuric acid anodising can have various coloured surfaces by dying. Hence, engineers specify type II anodising for architectural components and consumer electronics.
Sulfuric acid anodising, MIL-A-8625 Type II, is the most prevalent anodising technique. The resulting films typically range between .0001″ to .001″ in thickness, forming a coating that penetrates 67% into the substrate and grows 33% over the original part dimensions.
Sulfuric acid anodising differs from other techniques because it excels in hardness and abrasion resistance applications. However, in situations where parts endure substantial stress, such as aircraft components, the potential presence of corrosive acid residue is undesirable. Sulfuric acid films’ porous nature before sealing proves advantageous in creating coloured surface finishes on aluminium and its alloys. The porous aluminium oxide effectively absorbs dyes, with subsequent sealing preserving colour integrity during service.
Although dyed anodised films retain colour reasonably well, continued exposure to direct sunlight may cause some colours to bleach. Available hues include black, red, blue, green, urban grey, coyote brown, and gold. Parts can undergo chemical or mechanical treatment before anodising to achieve a matte, non-reflective finish.
Sulfuric acid anodising characteristics
- Harder surface compared to chromic anodise (CAA)
- Comparably cheaper in terms of chemical usage, heating, power consumption, and time required to achieve the desired thickness
- Suitable for a broader range of alloys
- Compliant with MIL-A-8625 Type II standards
- Simplified waste treatment compared to chromic anodise, contributing to cost reduction
- A transparent finish allows for a more comprehensive array of colour options during dying.
Sulfuric acid anodising applications
- Computer and electronic enclosures
- Optical components
- Hydraulic valve bodies
- Military weapons and mechanical hardware components
Hard Anodising – Type III
Hardcoat anodising, or hard anodising, involves creating a dense coating of aluminium oxide on thoroughly cleaned aluminium alloy components. This coating uses a specific electrolyte, usually near-freezing sulfuric acid, and high voltages to create a thicker, more abrasion-resistant coating than other anodising types.
It differs from other anodising types like chromic acid anodise (Type I) and conventional sulfuric acid anodise (Type II). Type III, or hard anodising, undergoes more stringent processes, resulting in a harder, denser, and thicker coating, ranging from 0.0005 to 0.0030 inches or more based on the alloy being anodised.
The appearance of hard anodising varies based on the alloy and coating thickness. Undyed coatings change the aluminium’s colour, while dyed coatings, mainly black, are more uniform and commonly specified.
Approximately half of the coating penetrates the part’s surface, resulting in a 0.001″ dimensional change per surface for a typical 0.002″ thickness requirement.
Whether to seal hard anodising depends on its intended use. It’s usually left unsealed for wear resistance, while sealing is recommended for corrosion resistance, especially for dyed coatings, using different sealing methods.
Several specifications govern Hard anodise, including MIL-A-8625 Type III, AMS 2469, ASTM B580 Type A, ISO 10074, MIL-A-63576 (PTFE Sealed), and AMS 2482 (PTFE Sealed). These specifications outline the standards and requirements for this anodising process.
Hard Anodising characteristics
- Provides excellent corrosion protection.
- Improved electrical insulation properties.
- Thickness ranges from .001″ to .004″, significantly thicker than other anodising types.
- Exceptional hardness and wear resistance compared to other anodising methods.
- Enhanced surface durability and scratch resistance.
Hard anodising applications
- Industrial machinery components for increased corrosion resistance and hardness.
- Firearms and weapon parts for durability and corrosion protection.
- Medical devices require a hard, durable surface for longevity and cleanliness.
- Automotive parts, such as pistons, cylinders, and gears, for improved wear performance.
- Aerospace components require high wear resistance and durability.
How does the Anodising process work?
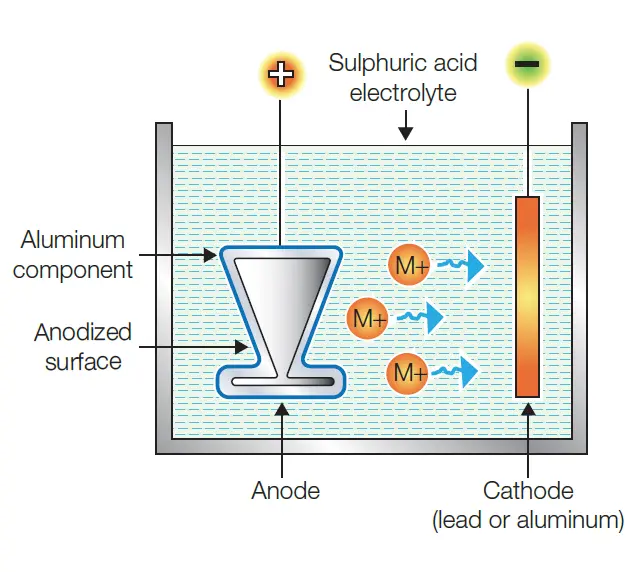
The anodising electrochemical process involves immersing an aluminium component into a tank of sulfuric acid electrolyte while passing an electric current through the element. The electrochemical process uses the cathode fitted inside the anodising tank, the aluminium component acting as an anode and the acid inside the tank as an electrolyte.
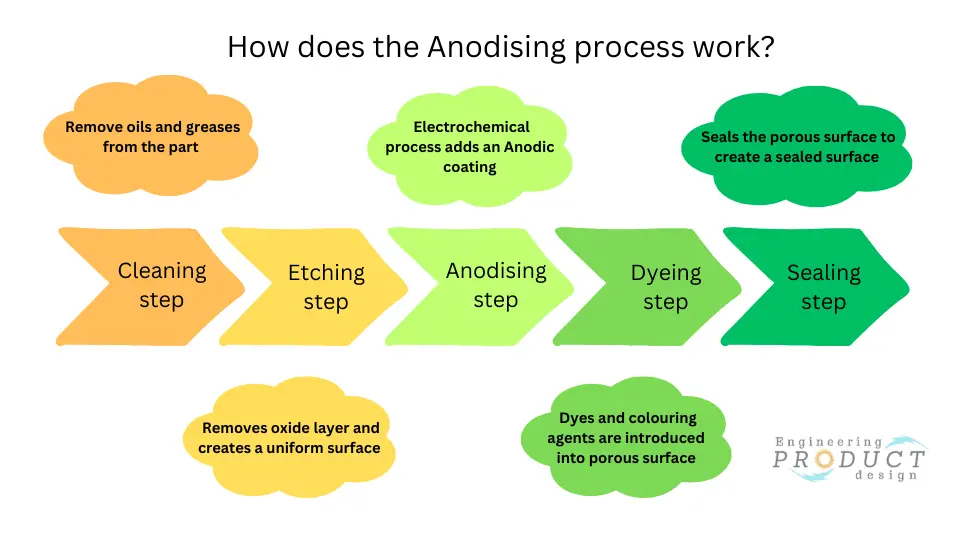
The anodising process typically involves the following steps:
Cleaning step
The manufacturer loads the aluminium alloy components onto carrier racks, which provide electrical conductivity through the material.
The first step is a pre-treatment cleaning process to remove oils and greases, which, if not removed, can interfere with the anodising process. This step is critical to ensure no spotting or uneven etching of the surface.
Pre-treatment cleaning is done by dipping the parts into an alkali or acid-based detergent bath to remove any oils and greases from previous manufacturing processes like CNC.
Pre-treatment – Etching step
The parts are etched in a mild acid solution to remove the surface oxide layer, create a uniform surface, and remove any minor imperfections. This helps to ensure that the anodising process is consistent across the entire surface of the part. This prepares the surface for the anodising and provides a uniform matte finish.
Two methods are employed to remove surface flaws: one involves caustic soda, while the other, known as acid etching, utilises fluoride-based ions to treat the surface and eliminate imperfections.
Then, parts are again rinsed in caustic or acid to remove any residue from the etching step, called de-smutting. Manufacturers might conduct de-smutting more than once to suit the part’s complexity.
Anodising step
After removing from the etching bath, the parts are immersed in the sulfuric acid electrolyte. An electrical current is passed through the component via the rack, electrolyte and the cathode inside the tank, causing the release of oxygen ions.
This electrochemical process causes a thick layer of aluminium oxide to form on the part’s surface. The anodic coating fuses into the part and grows outward, creating a fully integrated layer.
The anodising voltage determines the oxide layer thickness and the time the part is spent in the electrolyte solution.
Immersion time is carefully monitored because it governs the desired thickness of the coating. Manufacturers use this to control the thickness to the customer’s specification.
The anodising process generates a lot of heat. Hence, the electrolyte is sometimes refrigerated to maintain a suitable temperature.
After the anodising process, the part is rinsed in de-ionised water to remove all minerals. Otherwise, this could cause spotting during the final steps.
Dyeing or Colouring step
The newly created anodic surface has a porous structure, and dissolved metal salts or organic dyes can be introduced into open pores to create various colours and shades by immersing them in a dye solution.
The dye is absorbed in anodic surface pores, creating a permanent colour.
Sealing step
The final anodising process step is to seal the porous surface to create a uniform sealed surface, which also helps make the anodised finish more durable and scratch-resistant.
Two of the most common types of sealing are hot de-ionised water sealing and cold sealing with either a nickel acetate or Sodium Dichromate solution.
Sealing solution
- Nickel acetate is a widely used sealing solution in the anodising process. It operates by chemically depositing nickel ions within the pores of the anodic layer, forming a protective barrier that enhances corrosion resistance and improves dye retention for coloured anodised surfaces.
- Sodium dichromate is another sealing solution used in anodising. It penetrates the anodic oxide layer’s pores. It creates a sealing compound, enhancing the surface’s resistance to corrosion and providing better dye retention for coloured finishes.
Types of Sealing
- Hot Water Sealing – This method immerses the anodised part in hot water or steam. The heat causes the pores in the anodic layer to expand, allowing the sealing solution to penetrate and fill these pores effectively. This process improves corrosion resistance and dye retention for coloured anodised surfaces.
- Cold Sealing – This method applies the sealing solution at room temperature or slightly above. Unlike hot water sealing, cold sealing does not require high temperatures, which can benefit certain materials or parts sensitive to heat.
The choice between hot water and cold sealing depends on factors such as the material being anodised, the products’ required specifications, and specific industry standards or regulations.
Benefits and limitations of Anodising
Advantages of Anodising
- Corrosion resistance – The anodised surface is highly resistant to corrosion, even in harsh environments.
- UV radiation resistance – Anodised parts resist ultraviolet radiation, making them suitable for outdoor use. UV degradation of the material
- Wear resistance – Anodised aluminium is resistant to wear and abrasion; hence, it is used in applications where friction is a concern or in harsh environments.
- Electrical insulation – Anodised aluminium is a good insulator, which sometimes makes it suitable for electrical applications
- Decorative value – Anodised aluminium can be dyed in various colours, making it a popular choice for decorative applications. Parts can also be either matte, satin, or gloss.
- Environmental friendliness – Anodising is a relatively environmentally friendly process, using no hazardous chemicals.
- Increase adhesion – The porous nature of the anodised surface improves the adhesion of paint, adhesive and other coatings. Hence, sometimes products for harsh environments are anodised and then painted using either wet paint or powder coating.
Disadvantages of Anodising
- Cost – Anodising can be more expensive than other metal finishing processes, such as wet painting or powder coating. However, durability and corrosion resistance often make it a cost-effective choice in the long run.
- Size limitations – Anodising tanks can be unsuitable for large or tiny parts. Tiny parts can require more work to provide the necessary electrical contact.
- Compatibility limitations –Aluminium alloys are the most commonly anodised material. Not all aluminium alloys are suitable for anodising, such as the 2000 series alloy with copper as the primary alloying element.
- Batch variability – Achieving consistent colour between batches isn’t easy due to time at various stages of the anodising process and the bath’s cleanliness.
- Not repairable – It is impossible to repair when the layer is damaged or removed. The only option is to strip the anodising of the part and re-anodise, which is costly and time-consuming.
- Difficult to maintain tight tolerance – Due to thickness build-up, it is challenging to maintain very high tolerance on an anodised surface.
How to design parts for anodising
Creating components suitable for anodising requires a meticulous approach that aligns with Design for Manufacture and Assembly (DFMA) guidelines while addressing functional needs. Anodising, whether for function or aesthetics, demands attention to various critical factors, ensuring cost-efficiency and high-quality outcomes.
Material Consideration
Select anodising as a surface finish only if the chosen material can be anodised. Non-ferrous materials like aluminium, titanium, and magnesium are viable options. Aluminium, widely used in product design for its excellent mechanical properties, is a prime candidate for anodising. The 6000 series exhibits superior anodising properties among aluminium alloys, whereas the 2000 series fares poorly.
Sharp edges and corners
The anodising process grows and creates deep micro pockets perpendicular to the surface. The pocket creation is limited at sharp edges and corners; hence, you would have a non-anodised area.
Whenever possible, utilising rounded edges and radii ensures a continuous surface area and promotes better chemical adhesion.
| Nominal coating thickness (mm) | Radii of the edges and inside corner (mm) | Nominal coating thickness (inch) | Radii of the edges and inside corner (inch) |
| 0.0254 | 0.8 | 0.001 | 1/32 |
| 0.0508 | 1.6 | 0.002 | 1/16 |
| 0.0762 | 2.4 | 0.003 | 3/32 |
| 0.1016 | 3.2 | 0.004 | 1/8 |
Prototype
Ensure embodiment phase prototypes are anodised to avoid assembly and functional issues. For example, the anodising thickness might affect the assembly process. If not tested during the prototyping stage, the tolerance build-up due to anodising thickness might affect how the parts assemble.
Provide drainage features
Ensure drainage holes or channels in the design allow the anodising solution to flow freely across the surface and drain out of the part when removed from the bath. If the drainage is poor, parts will not be adequately cleaned between the different stages, affecting the anodising quality. Any acid residue can also Increase the chance of corrosion.
Internal and external threads
Account for changes in thread dimensions caused by coating thickness. The pitch diameter of internal threads decreases by twice the coating thickness, and the pitch diameter of external diameter increases by twice the coating thickness. Unless the thread is masked during the anodising process, allow enough thread tolerance for these dimension changes.
Uniform wall thickness
Since anodising is an electromechanical process, even material thickness promotes uniform anodising thickness, increasing the quality of anodising. Try to avoid extreme variations in wall thickness in your part design.
Part geometry
Avoid complex geometries and intricate features, as they might require special attention to achieve a uniform coating during the anodising process. Ensure the design
Avoid dissimilar metals
If multiple metals are incorporated into the design, ensure they are compatible with the anodising process. Or anodise the part before adding other metal components. For example, aluminium sheet metal cannot be anodised with stainless steel threaded fasteners.
Holding & hanging
All the parts for anodising need to be suspended inside the bath during the process. This connection fulfils a dual function of holding the part inside the tub and connecting the part electrically.
Avoid trapped pockets and recesses
Avoid features within the part that can lead to airlock, where air or gases cannot escape. This can prevent the formation of anodised coating, limit coating thickness and inhibit dyeing. Ensure the part is designed to minimise these recesses and have an idea of how the part is hung during the anodising process.
Surface finish and texture
Specify the desired surface finish. Finer finishes yield better-anodised results. A smooth surface reduces the risk of irregularities and produces long-lasting anodic coatings
Dimensional change
Remember that anodising adds a layer to the material, so account for changes in dimensions caused by coating thickness. Features like bearing bores, dovetail joints, and o-ring grooves need special attention during dimensioning. Factor this into your design, especially for tight tolerances.
Masking
Masking is required where no build-up is desired or when a part needs both anodising & chemical conversion coatings. Unless otherwise specified, all threaded holes, 1/4″ or smaller, are typically masked when hard anodising.
Any dissimilar metal (steel, brass, bronze) or plating will burn off in the anodising tank unless masked; hence holes with heli-coils will be masked.
Minimise tooling marks
Avoid tooling marks or sharp machining lines, as they can affect the anodising process and show up in the anodising coating. More etching time or bead blasting
Minimise tooling marks that might impact the anodising process
Specify in drawings
Specify anodising requirements clearly in drawings, including type, colour, masking needs, and connection points if necessary.
Designing parts for anodising demands a holistic approach that accounts for material compatibility, geometry simplification, precise tolerances, and meticulous attention to detail to achieve optimal results in both function and aesthetics.
Recommended reference
- Wernick, S., Pinner, R., & Sheasby, P. (2002). Surface Treatment & Finishing of Aluminium and Its Alloys. 5th ed. Elsevier Science.
- United States Department of Defense. (2000). Military Specification: Anodic Coatings for Aluminum and Aluminum Alloys. MIL-A-8625F. Defense Logistics Agency.
- Jude Mary Runge. (2018). The Metallurgy of Anodizing Aluminum. Springer Cham