Additive manufacturing, or 3D printing, uses successive layers of material to create 3D objects.
Contents covered in this article
Introduction to Additive Manufacturing (AM)
Additive Manufacturing (AM), commonly known as 3D printing, is a transformative approach to industrial production that enables the creation of three-dimensional objects through successive material layering. This innovative technology reshapes how we build products, significantly reduces waste, and allows for intricate designs that traditional manufacturing processes cannot achieve.
What is Additive Manufacturing (AM)?
Additive Manufacturing (AM) means creating three-dimensional objects from a digital model by layering material. Unlike traditional subtractive manufacturing, which removes material from a solid block, 3D printing adds material layer by layer to build the final product. This method enables the creation of complex geometries, reduces waste, and offers the flexibility to use various materials.
The basic principle of Additive Manufacturing technology is that it uses a CAD-generated 3D model directly to fabricate a three-dimensional object by adding layer after layer of material and fusing them.
More than enough statistics support the claim that the introduction of 3D Printing has revolutionised the industrial world in a way no other product has achieved this momentous success in the last 35 years.
History of Additive Manufacturing
Chuck Hull, an American engineer at 3D Systems Corporation, is accredited with inventing 3D Printing in 1983, also known as a solid imaging process called stereolithography (3D Printing). He also invented the first commercial rapid prototyping technology and the STL file format. Thanks to Hull, his contributions to the STL file format, digital layer slicing, and infill strategies are still being used today in many additive manufacturing processes.
Since then, many companies have invented and introduced new techniques. Because the technology is relatively new, companies that develop and introduce different techniques under new marketing terms, even though the core technique might be the same.
A technical committee under ASTM international finally defined these processes appropriately as Additive Manufacturing (AM), as the technology builds 3D parts by adding material compared to subtractive manufacturing.
According to ISO/ASTM standards, additive manufacturing technologies are divided into seven types according to the techniques used to create the layers, energy source, and fuse material.
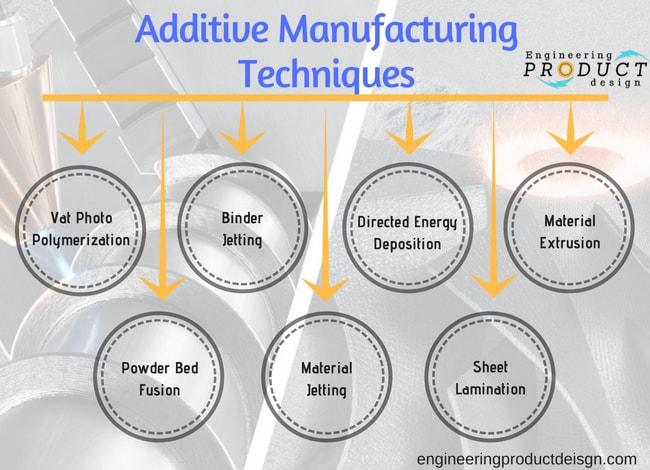
What are the 7 additive manufacturing processes?
Additive Manufacturing encompasses seven main technologies, each utilising different processes and materials to build objects. These technologies are classified based on how they create layers and the materials they use.
Seven main additive manufacturing technologies are as follows:
- Vat photo-polymerisation
- Material Extrusion
- Material Jetting
- Binder Jetting
- Powder bed fusion
- Directed energy deposition
- Sheet lamination.
You can partially view the standards here.
Vat Photopolymerisation
This process uses Photopolymerization, in which radiation-curable resins or photopolymers are used to create three-dimensional objects by selectively exposing them to ultraviolet light. When exposed, these materials undergo a chemical reaction and become solid. Only plastics can be printed using these technologies.
This process is known for producing high-resolution parts and is commonly used in industries like dentistry and jewellery.
Subtypes: Stereolithography (SLA), Digital Light Processing (DLP).
Three main types under this category are Stereolithography, Digital Light Processing and Continuous Digital Light Processing.
Binder Jetting
As the name implies, Binder Jetting selectively deposits the bonding agent, a binding liquid, to join the powder material to form a 3D part. This process differs from any other AM technology as it does not employ heat during the process like others to fuse the material, making it suitable for a wide range of materials, including metals and ceramics.
The print head and a powder spreader deposit alternating layers of bonding agent and build material to form a 3d object.
Directed energy deposition
Directed energy deposition technology uses focused thermal energy such as a laser, electron beam, or plasma arc to melt and fuse the material as they are deposited to create a 3D object. These are very similar to the welding process but very finely detailed.
The geometric information in a Computer-Aided Design (CAD) solid model is used by LENS 3D printers to autonomously direct the DED process as it builds up a part layer by layer.
The two main types of Directed energy deposition technologies are LENS and EBAM. EBAM uses an electron beam, and LENS uses a focused laser to melt the material.
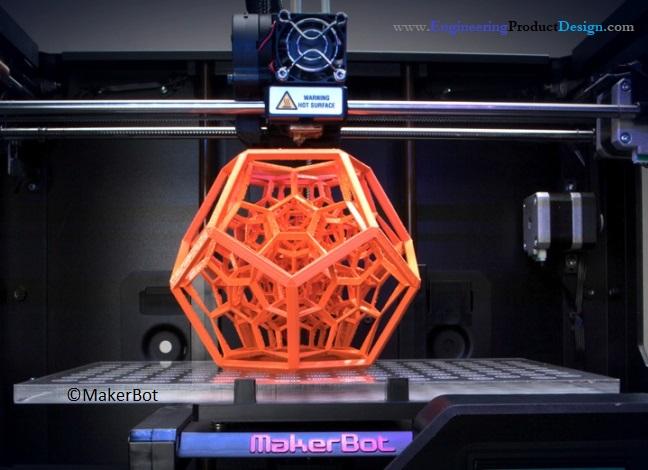
Material extrusion
Material Extrusion is an additive manufacturing technique that uses a continuous thermoplastic or composite material filament to construct 3D parts. Material extrusion was initially developed and patented by S. Scott Crump under Fused Deposition Modelling (FDM) in the 1980s.
In this additive manufacturing technique, the continuous filament of thermoplastic is fed through a heated nozzle before being deposited layer by layer onto the build platform to create the object.
Material jetting
In material jetting, build material droplets are selectively deposited layer by layer into the build platform to form a 3D part.
This additive manufacturing technique is very similar to standard inkjet printers, where the material droplets are deposited layer by layer selectively to create a three-dimensional object. Once a layer is complete, it is cured by ultraviolet light.
Powder material jetting includes the following commonly used printing technologies: UV-cured Material Jetting, Drop-on-Demand (DOD), and nano-particle jetting (NPJ).
Powder bed fusion
Powder bed fusion is an Additive Manufacturing technique that uses a laser or electron beam to melt and fuse the material to form a 3D geometry part. Powder Bed Fusion includes the following commonly used printing technologies: Multi-Jet Fusion (MJF), Direct metal laser sintering (DMLS), Electron beam melting (EBM), Selective heat sintering (SHS), Selective laser melting (SLM), and Selective laser sintering (SLS).
Powder bed fusion processes, especially selective laser sintering, are early industrial additive manufacturing techniques. This method uses a laser or electron beam to melt the powdered material and fuse it to create a solid object.
Sheet lamination
Sheet lamination technologies use sheets of material to create 3D objects by stacking them and laminating them using either adhesive or ultrasonic welding. Once the object is built, the unwanted areas of the sections are removed layer by layer.
Sheet lamination technology is an umbrella term for Ultrasonic Additive Manufacturing (UAM, Selective Deposition Lamination (SDL, and Laminated Object Manufacturing (LOM).
Advantages and disadvantages of additive manufacturing
Advantages of additive manufacturing
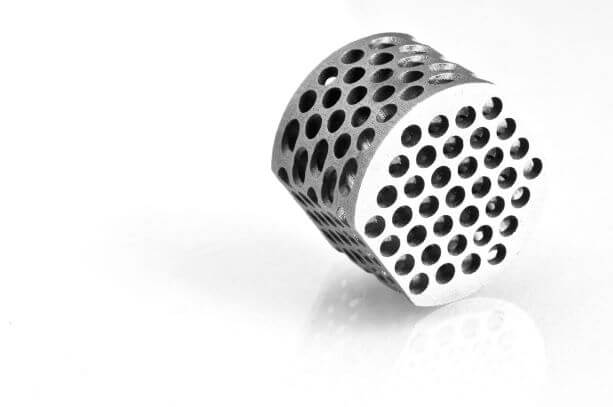
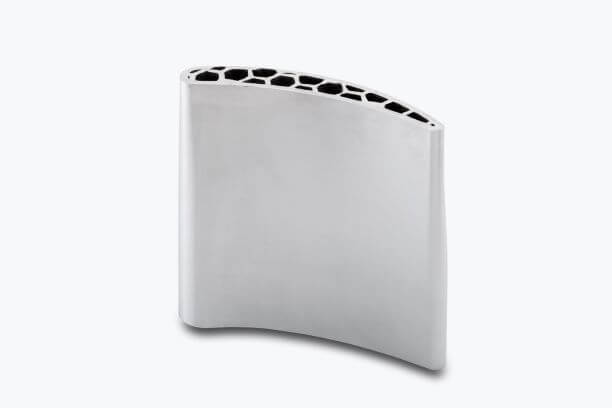
- Complex Geometries: AM enables the creation of intricate 3D geometries with internal features, eliminating the need for traditional tooling.
- Reduced Waste: This technology uses material more efficiently than traditional machining, minimising waste.
- Direct Digital Manufacturing: Parts can be directly produced from a 3D model, bypassing the need for detailed drawings.
- Rapid Prototyping: AM allows for the swift creation of prototypes, facilitating quicker iterations and accelerating the design cycle.
- Customisation: Small batch production benefits from minimal or no tooling, offering greater flexibility than traditional machining.
- Production Tooling: AM can produce custom tooling directly, streamlining the manufacturing process.
- Material Versatility: AM supports the combination of different materials during printing, enabling the creation of unique alloys and varied material properties within different sections of the same part.
Disadvantages of additive manufacturing
- Slower and Costlier Production: Additive manufacturing (AM) remains relatively new, resulting in slower build processes and higher costs.
- High Equipment Costs: The initial investment in AM equipment can be substantial, contributing to elevated production expenses.
- Extensive Post-Processing: The required post-processing level varies by AM technique but can be extensive, adding time and cost to the overall process.
- Limited Build Volume: AM typically supports smaller build volumes than traditional manufacturing methods like sand casting, restricting the size of parts that can be produced.
- Inferior Mechanical Properties: Parts produced through AM often have less favourable mechanical properties than those made using traditional methods, necessitating further post-processing for enhanced performance.
- Surface Finish and Texture: The surface quality of AM parts generally falls short of that achieved by conventional processes such as CNC machining and investment casting, often requiring additional finishing work.
- Lower Part Strength: The strength of parts created using AM is generally weaker compared to those produced by methods like die casting, investment casting, and CNC machining, impacting their structural integrity in certain applications.
How does Additive Manufacturing Technology work?
Although the process flow of the 7 different additive manufacturing technologies used to create the 3D parts varies, each broadly follows these common steps to create the final part.

3D Model creation step
First, the designer creates a 3D model of the object to be printed using computer-aided design (CAD) software or a 3D object scanner. Since the part is a replica of the 3D model, every detail needs to be correct and fully defined in its external geometry.
Although AM can print complex parts and give the product designer more design flexibility than conventional manufacturing processes, there are still limitations and rules to adhere to when designing to achieve the best results.
The design guides vary according to the type of additive manufacturing technology and material selection. Equipment manufacturers and AM technology service providers have extensive design guides for designing parts. To learn more, refer to the types of AM technology and their manufacturers.
STL file creation step
Once the designer is happy with the design, the user converts the CAD file to a standard AM format called standard tessellation language (STL), which 3D Systems developed in the late 80s for use in its Stereolithography (SLA) machines. You can read how the STL file is created and used for 3D Printing here.
Most CAD software, such as SolidWorks, Inventor, and Catia, can save any model as an STL file. However, all printer manufacturers have software that can convert any CAD format into an STL file.
As the name suggests, this will tessellate the 3D shape and slice the part into digital layers. The layer thickness dictates the final quality and depends on the machine and process.
STL file transfer step
The STL file is then transferred to the printer, often using custom machine software, where the model is manipulated to orientate for Printing. At this stage, machine software might create its file with extra information, such as support structure and temperature.
Machine set up
Each additive manufacturing technology and its variants have its own steps and requirements for setting up a new printing job. Setup includes material selection, orientation, printer temperature, support structure, and build platform levelling. It also involves loading print material, binders, and other consumables into the machine.
Machine software then converts the STL file information into G-code. G-code instructions are information for the actuators, such as motors, telling them where to move, how quickly to move, and what path to take.

Multiple parts can be set up to reduce printing costs, and waste can be minimised by choosing the correct orientation.
Part building
Once the build starts, the design is gradually built one layer at a time. A typical layer is around 0.1mm in thickness, but depending on the technology and material, it can be as thin as 20 microns.

Depending on the build size, the printing machine, AM technology, material, and printing resolution, this build process could take hours or even days to complete.
Part removal
In some cases, after building the part or multiple parts, a cooling-off period may be needed before removing them from the machine. Again, removal could vary depending on the machine and technology, from simply peeling off the build platform in FDM to wire eroding from the build plate in DMLS.
Post-processing step
Almost all additive manufacturing techniques require some form of post-processing. Depending on the AM technology used and the part’s end-use, this can range from simple cleaning and polishing to machining and heating treatment.
Finally, post-processing, such as cleaning, polishing, and painting, might be required.
As discussed, each of the 7 Additive manufacturing technologies varies depending on the underlying technology used to lay material onto the build platform, the type of material used, the type of energy used, and the post-processing.
Acronyms, Abbreviations & Glossary of Additive Manufacturing
| 3D file / 3D model | It is an electronic file representing a three-dimensional object created either by 3D modelling software or a 3D scanner |
| 3DP | 3D printing or 3-dimensional printing |
| 3SP | Envision tec’s patented scan, spin & selectively photocuring technique to create 3D prints |
| ABS | Acrylonitrile Butadiene Styrene is an opaque thermoplastic and amorphous polymer. |
| AM | Additive Manufacturing, commonly known as 3D printing, in which a 3D object is fabricated by adding layer-upon-layer of material and fusing them |
| BJ | Binder Jetting is a 3D printing technique in which a binding liquid is selectively deposited to join powder material to form a 3D part – learn more here. |
| Bridge | Print sections are supported at both ends but not in the middle. |
| Bowden tube | A Bowden tube, called a Bowden cable, guides filament from the feeder to the print head on material extrusion printers. |
| Build envelope | Build envelope is the maximum volume the printer can print and determines how large an object the printer can build |
| Build plate | Also known as the Build platform or Bed is the surface or area of the 3D printer on which parts are formed. |
| CAD | Computer-Aided Design |
| CAM | Computer-Aided Manufacturing |
| CDLP | Continuous Direct Light Processing is part of the vat photopolymerisation AM method, where a photopolymer liquid resin is cured to make hard plastic parts. |
| CNC | Computer Numerical Control |
| Cura | Cura is an open-source 3D printer slicing application used and optimised for Ultimaker printers – more here. |
| DED | Direct Energy Deposition – It is one of the additive manufacturing techniques where focused thermal energy such as a laser, electron beam, or plasma arc is used to fuse materials by melting as they are being deposited |
| DLP | Direct Light Processing is part of the vat photopolymerisation AM method, where a photopolymer liquid resin is cured to make hard plastic parts. |
| DMD | Direct Metal Deposition |
| DMLS | Direct Metal Laser Sintering – Learn more here |
| DOD | Drop-On-Demand |
| EBAM | Electron Beam Additive Manufacture |
| EBM | Electron Beam Melting |
| Extruder | Using two counter-rotating gripping wheels, a 3D printer head module pushes the filament through the Bowden tube to the hot end. |
| FDM | Fused Deposition Modeling |
| FFF | Fused Filament Fabrication |
| Filament | FDM printers operate by melting a plastic filament, which is typically made of either ABS or PLA |
| Fill / Infill | The interior structure of a 3D-printed object. To avoid wasting time and material by printing solid objects, the interior of the objects is printed with a mesh-type structure. The infill is typically expressed as a percentage (e.g., 10%). |
| G-code | G-code is the file format that stores information that CNC machines and 3D printers can interpret. |
| GDP | Gel Dispensing 3D Printing technology that utilises movement similar to what is used in FDM systems while working with a UV-sensitive material that hardens when exposed to UV light |
| GF | Glass-Filled |
| Hot end | The material extrusion method of additive manufacturing uses a material extruder that gets hot enough to melt plastic or other materials. |
| Kapton tape | Heat-resistant polyimide adhesive tape is often used in material extrusion printers to cover the surface of the print bed. This provides better adhesion to the 3D-printed model and prevents it from warping. |
| LCM | Lithography-based Ceramic Manufacturing is a process for the additive manufacturing of high-performance ceramics |
| LENS | Laser Engineered Net Shape |
| LMD | Laser Metal Deposition, a printing process which casts and fuses metal with a laser beam |
| LOM | Laminated Object Manufacturing |
| LS | Laser Sintering |
| Material Extrusion | 3d printing, where a continuous thermoplastic filament is used to construct 3D parts. Learn more here |
| Mesh | meaning the dividing of a model into basic blocks or structures that are small and simple enough to do calculations on them |
| Micron | a unit of length equal to one-millionth of a metre |
| MJ | Material Jetting |
| MJF | Multi Jet Fusion |
| Netfabb | A commercial 3D print preparation application, Netfabb can prepare, repair and slice 3D models in preparation for printing. Learn more here www.netfabb.com |
| Nozzle | The part of the hot end of the printer deposits the melted plastic material. |
| NPJ | NanoParticle Jetting |
| OBJ | Object file – A geometry definition format from 3D modelling programs commonly used in 3D printing. |
| Overhang | Parts or features of a 3D model that protrude or overhang at an angle over 45 degrees without any support below when orientated on the build platform are generally categorised as overhangs. |
| PA | Polyamide |
| PBF | Powder Bed Fusion |
| PC | Polycarbonate |
| Photopolymer | A polymer that changes its properties when exposed to light. |
| PIM | Plastic injection moulding |
| PLA | Polylactic Acid – A biodegradable thermoplastic polymer made from plant starch, used as a 3D printer material. |
| Polyjet | It is one of the 3d printing techniques which fall under Material jetting |
| PP | Polypropylene |
| PVA | Polyvinyl Alcohol – A water-soluble filament often used as support material in 3D printing. |
| Raft | The raft is a removable filament latticework printed horizontally onto the build platform as support to minimise warping. The raft is larger than the part, hence better adhesion, and removed and discarded after printing. Rafts are commonly used with ABS material extrusion-type printers. |
| RE | Reverse Engineering is the process in which an engineering product is deconstructed to understand its designs and to extract knowledge about its working principle. |
| RepRap | Short for Replicating Rapid Prototyper, it is the first low-cost general-purpose self-replicating manufacturing/3D printing machine. |
| RM | Rapid Manufacturing |
| RP | Rapid Prototyping |
| RT | Rapid Tooling |
| Sheet lamination | One of the seven additive manufacturing techniques |
| .amf | Additive Manufacturing File |
| Shell | Also referred to it as the outline or outer perimeter, this describes the outermost wall of the printed 3D object |
| SHS | Selective heat sintering |
| SL | Stereolithography is an AM technology which produces parts using a process called photo polymerisation – refer more @ Vat Photopolymerization |
| SLA | Stereolithography Apparatus |
| Slicer / Slice | This software converts the digital 3D file into machine-readable code. The slicer cuts the model into thin horizontal layers called slices and generates tool paths in the two-dimensional plane. |
| SLM | Selective Laser Melting |
| SLS | Selective Laser Sintering |
| STL/.stl | known as the Stereolithographic file, it is the most common file format 3D printers use. |
| Support / Support material | 3D objects with large overhangs or gaps require removable supports to stop them from collapsing during printing. Sometimes, these are printed using materials different from the main part’s material. |
| Thermoplastic | They are a type of plastic material which becomes soft when heated above a specific temperature and hardens when cooled. |
| TPU | Thermoplastic Polyurethane |
| Vat Photopolymerization | Vat photopolymerisation is an AM method with a light source to cure photopolymer liquid resin and turn it into hard plastic parts. |
| Voxel | In 3D printing, a voxel represents a value on a regular grid in a three-dimensional space, like a pixel with volume. |
Frequency Asked Questions
Is 3D Printing the same as Additive Manufacturing
Yes, 3D printing is a term commonly used to refer to Additive Manufacturing, though the latter encompasses a broader range of technologies beyond just 3D printing.
Additive manufacturing vs Rapid prototyping vs 3D Printing
What are the differences between Additive Manufacturing, Rapid Prototyping, and 3D Printing? While all these terms are related, Rapid Prototyping focuses on quickly creating models for testing and development, 3D Printing refers to the layer-by-layer fabrication process, and Additive Manufacturing is the broad term that includes both and more.
How to choose a 3D printing company?
In recent years, 3D printing has become more accessible and affordable, so many companies have started offering 3D printing services. These companies range from small, local 3D printing shops to large, multinational corporations. They offer various services, from prototyping and product design to low-volume production and custom manufacturing. With the increasing demand for 3D printing, many options exist for businesses and individuals looking for high-quality, cost-effective 3D printing services.
Choosing the right 3D printing company is essential for several reasons, such as the Quality of the prints, Cost-effectiveness, Material options, and lead time. By carefully considering these factors, you can choose the right company that meets your needs and helps you achieve the best results for your project.
Here are a few factors to consider when choosing a 3D printing company:
- Printing Technology
- Material options
- Quality and Accuracy
- Lead time
- Cost
- Customer service
What is the most common 3D printing technology?
Fused Deposition Modeling (FDM), or Fused Filament Fabrication (FFF), is the most common 3D printing technology. It works by extruding a thermoplastic filament through a heated nozzle, which deposits the material layer by layer to build a three-dimensional object. This process is widely used due to its affordability, simplicity, and the broad availability of materials, making it ideal for both prototyping and small-scale production. FDM/FFF printers are popular in both consumer and industrial markets, offering versatility and ease of use for creating functional parts, prototypes, and models.
What are the most common 3D printing technologies?
The most common 3D printing technologies are:
1. Fused Deposition Modeling (FDM) / Fused Filament Fabrication (FFF)
- How It Works: Extrudes thermoplastic filament through a heated nozzle, which deposits material layer by layer to create objects.
- Applications: Prototyping, hobbyist projects, functional parts.
- Materials: PLA, ABS, PETG, nylon, composites.
2. Stereolithography (SLA)
- How It Works: It uses a laser to cure liquid photopolymer resin into solid layers, creating detailed, high-resolution parts.
- Applications: Detailed prototypes, dental models, jewellery.
- Materials: Photopolymer resins.
3. Selective Laser Sintering (SLS)
- How It Works: Utilizes a laser to sinter powdered material, binding it together to form a solid structure.
- Applications: Functional prototypes, complex geometries, end-use parts.
- Materials: Nylon, polyamide, metals, ceramics.
4. Digital Light Processing (DLP)
- How It Works: Projects light onto a vat of photopolymer resin to cure it layer by layer, similar to SLA but using a digital projector.
- Applications: High-detail parts, dental applications, jewellery.
- Materials: Photopolymer resins.
5. Multi Jet Fusion (MJF)
- How It Works: An inkjet array applies fusing and detailing agents to a bed of powdered material and then heats the layers.
- Applications: Functional parts, prototypes with complex geometries.
- Materials: Nylon, TPU, PA11, PA12.
6. PolyJet
- How It Works: Sprays layers of liquid photopolymer onto a build platform and cures them with UV light, allowing for high-resolution and multi-material parts.
- Applications: High-detail prototypes, complex parts with multiple materials or colours.
- Materials: Photopolymers.
7. Binder Jetting
- How It Works: Deposits a liquid binding agent over a bed of powder material, layer by layer, to build up an object, which is then cured.
- Applications: Full-color prototypes, metal casting patterns.
- Materials: Metal powders, ceramics, sand.
8. Electron Beam Melting (EBM)
- How It Works: Uses an electron beam to melt metal powder layer by layer in a vacuum, creating high-strength, fully dense parts.
- Applications: Aerospace, medical implants, high-performance metal parts.
- Materials: Titanium, cobalt-chrome, other metals.
Each technology has its strengths and ideal use cases, making it suitable for applications ranging from rapid prototyping to full-scale manufacturing.
References and recommendations
Books
- Bourell, D., Crawford, R., Seepersad, C., Stucker, B. and Rosen, D. (2020) Additive Manufacturing of Metals: The Technology, Materials, Design and Production. Cham: Springer. ISBN: 978-3-030-25435-7.
- Gibson, I., Rosen, D.W. and Stucker, B. (2021) Additive Manufacturing Technologies: 3D Printing, Rapid Prototyping, and Direct Digital Manufacturing. 2nd ed. New York: Springer. ISBN: 978-1-4419-1119-3.
- Gu, D. (2015) Laser Additive Manufacturing of High-Performance Materials. Cham: Springer. ISBN: 978-3-319-07401-6.
- Herderick, E. and Shor, K. (2022) Additive Manufacturing: Materials, Processes, Quantifications and Applications. Warrendale: ASM International. ISBN: 978-1-62708-374-5.
- Kumbhar, N.N. and Mulay, A.V. (2020) Laser Additive Manufacturing: Fundamentals, Processes and Applications. London: CRC Press. ISBN: 978-1-138-50002-6.
- Leach, R., Carmignato, S., Dewulf, W., Senin, N. and Townsend, A. (2019) Precision Metal Additive Manufacturing. 1st ed. Amsterdam: Elsevier. ISBN: 978-0-12-818829-6.
- Yang, L.J. and Tang, Y. (2020) Design for Additive Manufacturing: Perspectives from Product Design, Engineering, and Manufacturing. London: Academic Press. ISBN: 978-0-12-819579-9.
Websites
- ASTM International (2024) ‘Committee F42 on Additive Manufacturing Technologies’. Available at: https://www.astm.org/COMMITTEE/F42.htm (Accessed: 7 June 2024).
- Manufacturing.gov (2024) ‘Additive Manufacturing’. Available at: https://www.manufacturing.gov/technology/additive-manufacturing (Accessed: 7 June 2024).
Journals
- Grasso, M. and Colosimo, B.M. (2017) ‘Process defects and in situ monitoring methods in metal powder bed fusion: a review’, Measurement Science and Technology, 28(4), pp. 1-17. doi:10.1088/1361-6501/aa5c4f.
- Kruth, J.P., Leu, M.C. and Nakagawa, T. (1998) ‘Progress in additive manufacturing and rapid prototyping’, CIRP Annals, 47(2), pp. 525-540. doi:10.1016/S0007-8506(07)63240-5.
- Kumar, S., Prakash, S. and Kumar, V. (2021) ‘Recent advances in additive manufacturing technology for 3D-printed complex structures’, Journal of Manufacturing Processes, 64, pp. 1096-1117. doi:10.1016/j.jmapro.2021.01.057.
- Murr, L.E., Gaytan, S.M., Medina, F. and Martinez, E. (2010) ‘Next-generation biomedical implants using additive manufacturing of complex, cellular, and functional mesh arrays’, Philosophical Transactions of the Royal Society A, 368(1917), pp. 1999-2032. doi:10.1098/rsta.2010.0010.
- Thompson, M.K., Moroni, G., Vaneker, T., Fadel, G., Campbell, R.I., Gibson, I., Bernard, A., Schulz, J., Graf, P., Ahuja, B. and Martina, F. (2016) ‘Design for Additive Manufacturing: Trends, Opportunities, Considerations, and Constraints’, CIRP Annals, 65(2), pp. 737-760. doi:10.1016/j.cirp.2016.05.004.
Standards
- ASTM International (2019) ‘Standard Terminology for Additive Manufacturing Technologies (ASTM F2792-12a)’. West Conshohocken: ASTM International. Available at: https://www.astm.org/f2792-12a.html (Accessed: 7 June 2024).
- ISO/ASTM 52900:2021 ‘Additive manufacturing – General principles – Fundamentals and vocabulary’. Available at: https://www.iso.org/standard/69669.html (Accessed: 7 June 2024).
Reports
- Wohlers, T. (2024) Wohlers Report 2024: 3D Printing and Additive Manufacturing Global State of the Industry. Fort Collins: Wohlers Associates. Available at: https://wohlersassociates.com/2024-report/ (Accessed: 7 June 2024).