Rapid prototyping creates a preliminary product version to evaluate the design and its functionality.
Contents covered in this article
What is Rapid prototyping?
Rapid prototyping (RP) quickly creates a physical part directly from its CAD model data using various manufacturing techniques. Rapid prototyping can be used at any stage of the product development cycle for any components or sub-components. Prototyping can be repeated numerous times along the new product design process using the test data to achieve the desired part.
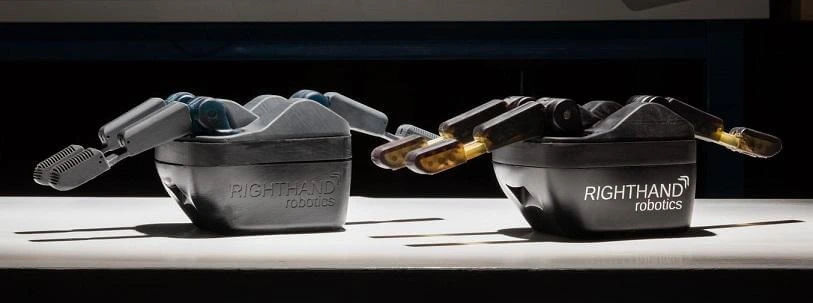
Rapid prototyping is a relatively new term and, in its simplest form, creating a prototype quickly to visually and functionally evaluate a part or some part features. Sometimes individual parts are rapidly created separately and assembled to test the prototype product.
So what is a Prototype? In an engineering product design context, a prototype is a preliminary version of the end-product used to evaluate the design, test the technology, analyse the working principle, and provide final product specifications. Prototypes are an integral part of engineering product design and, more importantly, in new product development.
Rapid prototyping & 3D Printing
Is rapid prototyping the same as 3D printing?
The simple answer is “No”. However, in the modern-day product development process, rapid prototyping is commonly used alongside terms like “3D printing” and “additive manufacturing”, mainly because 3D printing first came into prominence as a way of making prototypes quickly.
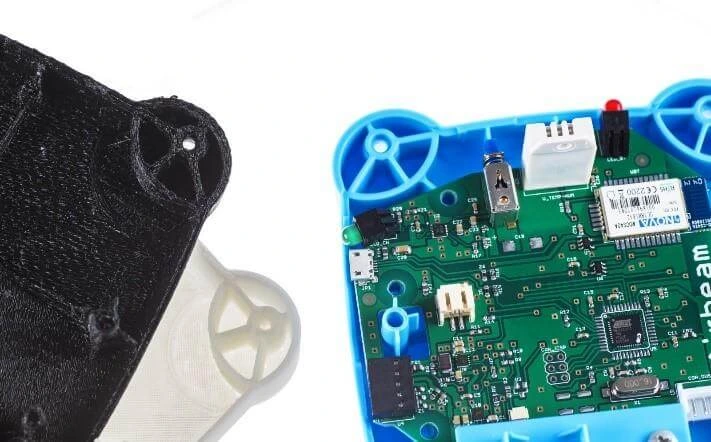
But the 7 types of additive manufacturing technologies have moved along and have made giant strides towards the production of quality parts and might not be the preferred choice for some prototypes due to higher costs.
So, what is the difference between rapid prototyping and 3D printing? 3D printing or additive manufacturing is a manufacturing process, while prototyping is the result or the end product. Furthermore, 3D printing on its own or other processes could be used to create rapid prototyping. (Read here on how does additive manufacturing works?)
Why is Rapid prototyping important?
Companies need to develop and introduce new products faster to remain competitive in this fast-moving modern-day consumer market. Since faster product development and technology innovation are vital to a company’s success, rapid prototyping becomes the most crucial element of new product development. Rapid prototyping achieves the following objectives.
- Faster new product development – Rapid prototyping plays a vital role in the process of creating successful products because it speeds up the new product development process
- Early-stage design/concept validation of the form, fit, and function of the design
- Final stage product verification against the technical requirement and business objectives
- It allows functionality testing to test the objectives of the concept and to finalise the product specification
- The prototype gives the end-user, client, customer, user participants hands-on user experience to get feedback
Rapid prototyping applications
- Visual prototypes
- Concept models
- Functional prototypes
- Pre-production prototypes
- Production tools prototypes
- Production moulds for prototypes
Types of Rapid prototypes
It is crucial to understand the types of prototypes in product design before rapid prototyping your design. Generally, rapid prototyping is for individual parts rather than assemblies. Therefore, either more than one rapid prototyped part makes up an assembly, or a single rapid prototyped part is used to test and evaluate the complete form, such as a model.
Prototypes can be categorised depending on the degree of accuracy required, product development stage, and purpose.
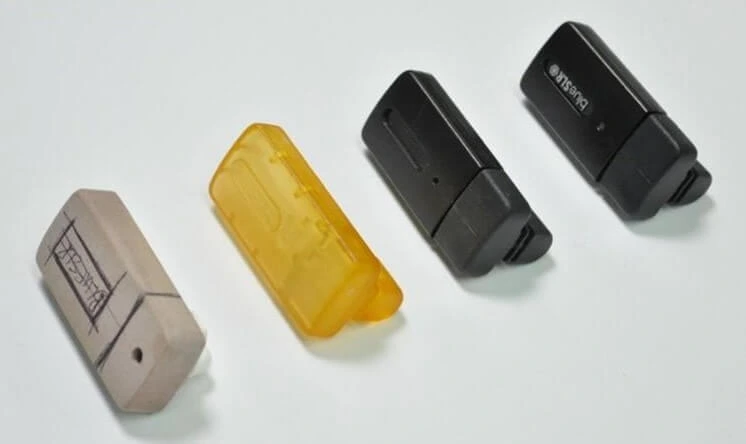
Rapid prototypes don’t necessarily need to look like final products and can vary depending on what the product designer is trying to achieve from the prototype. Rapid prototypes can be classified in terms of accuracy or “Fidelity”. The degree of prototype accuracy can vary from low-fidelity to high-fidelity in functionality, appearance, user interface, and size.
Low-fidelity prototype – Very simple and produced very quickly to test the broader concept. e.g. Paper sketches to cardboard mock-ups
High-fidelity prototype – These prototypes appear and function as similar and closer to the final product.
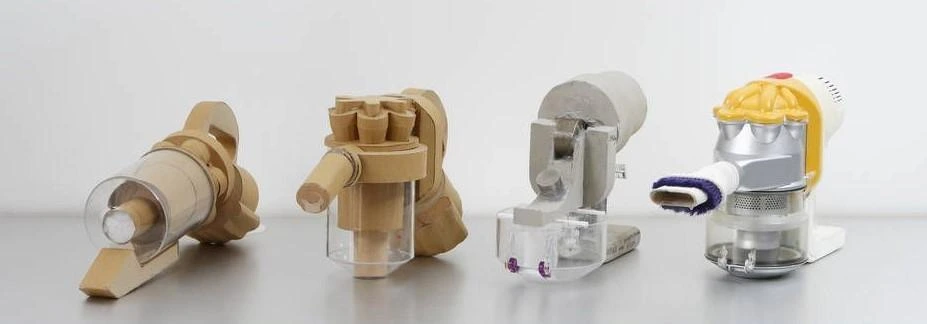
You can read “Prototyping 101: The Difference between Low-Fidelity and High-Fidelity Prototypes and When to Use Each” from Adobe Blog
Advantages & Disadvantages of Rapid Prototyping
Rapid prototyping has pros and cons, like any manufacturing process.
Advantages of rapid prototyping
- Reduced design & development time
- Reduced overall product development cost
- Elimination or reduction of risk
- Allows functionality testing at a fraction of the cost
- Improved and increased user involvement during design stages of NPD
- Ability to evaluate human factors and ergonomics
Disadvantages of rapid prototyping
- Lack of accuracy – If the function of the product relies heavily on the accuracy of the parts, then rapid prototype parts and assembly might not be able to f the same accuracy
- Added initial costs – Rapid prototyping costs money due to technologies used and faster turnaround required.
- Some rapid prototyping processes are still expensive and not economical
- Reduced material properties like surface finish and strength
- Rapid prototyping required skilled labour
- Limited material range
- Overlooking some key features because they cannot be prototyped affects the prototype testing
- End-user confusion, customers mistaking it for the finished project/developer misunderstanding of user objectives
Rapid prototyping techniques
Choosing a suitable rapid prototyping technology is critical to the prototype’s success. Each rapid prototyping technique has its compromise in terms of cost, speed, material compatibility of the feature, fidelity level and development stage.
| Stereolithography (SLA) | Binder Jetting |
| Fused Deposition Modeling | Poly Jetting |
| Selective Laser Sintering (SLS) | CNC Machining |
| Multi Jet Fusion (MJF) | Vacuum Casting |
| Direct Metal Laser Sintering (DMLS) | Investment Casting |
Rapid prototyping doesn’t need to be limited to one process; one can use more than one manufacturing technique to assemble a prototype.
Following are the types of rapid prototyping technology available for engineering product designers:
- Additive manufacturing – Stereolithography (SLA), Selective laser sintering (SLS), Direct metal laser sintering(DMLS), Fused Deposition Modelling (FDM), MJF, Binder jetting and Poly jetting
- Other techniques – CNC Machining Prototyping, Vacuum casting, Investment casting
Let us look at the Rapid prototyping techniques in detail:
Stereolithography (SLA)
Stereolithography (SLA) uses a laser to cure UV-curable resin to build parts from a pool of liquid resins. They are best for lower end functional prototypes, patterns, mould and production tools. SLA provides product designers and engineers with the ability to rapid prototype parts with excellent surface finish and good dimensional accuracy.
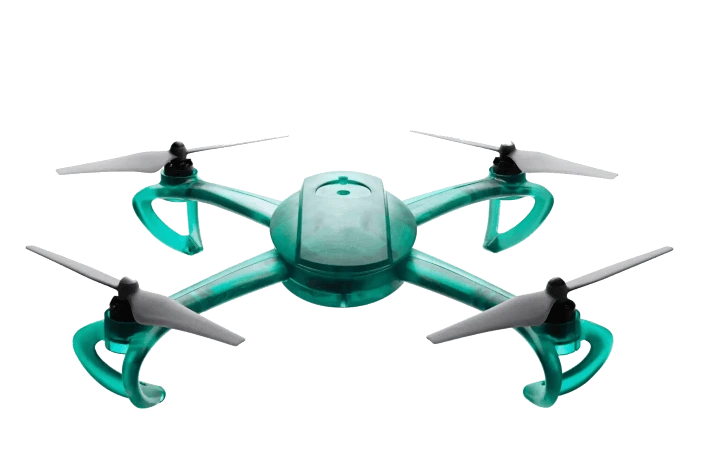
Learn more about understanding tolerance, accuracy, and precision in 3D printing.
| Advantages | Disadvantages |
| Reasonably priced | Low strength compared to other AM techniques limiting some functional testing |
| Excellent surface finish for AM parts | Overtime resin becomes brittle |
| Mature technology with a comprehensive material selection | Require support structures and slower speed |
Material – Tough and durable resins, flexible resins, elastic resins, rigid resins
Selective laser sintering (SLS)
SLS uses a laser to produce functional parts from polymer powder by sintering. Due to SLS parts’ internal porosity, they are brittle but have excellent tensile strength. Generally, SLS has a larger build volume and can generate parts with highly complex geometry and produce long-lasting prototypes.
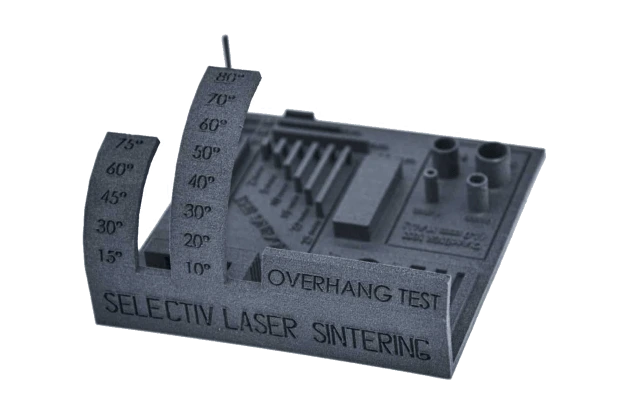
The technology’s low cost per component, high productivity, and proven materials suit various applications ranging from quick prototyping to small-batch manufacture.
| Advantages | Disadvantages |
| Durable with excellent accuracy | Rough surface finish with a grainy texture |
| Support structure not required | Limited choice on resin material |
| Suitable for dying and colouring | Porous and brittle structure |
Material options – PA11, PA12, PA12 40% glass filled, PA12 Carbon filled, TPU, PA12 – flex
Direct metal laser sintering(DMLS)
DMLS is an additive manufacturing technology that involves melting and fusing layers of metallic powder using a computer-controlled, high-power laser beam.
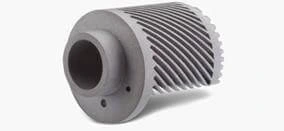
If designed to suit both applications, it can rapidly prototype Metal Injection Moulding (MIM). In addition, most alloys may be used in DMLS, allowing prototypes to be full-strength, functioning hardware produced of the same material as production components.
| Advantages | Disadvantages |
| Wide variety of metal alloys | One of the slowest |
| Excellent material properties | Expensive |
| Produces shapes and features that are difficult to make using conventional CNC machining | Specialised manufacturer |
Material – Aluminum alloys, Stainless steel, Titanium and some alloys
Fused Deposition Modelling (FDM)
FDM technology creates 3D parts by melting and extruding thermoplastic resins onto a Build platform layer by layer and letting it re-solidify.
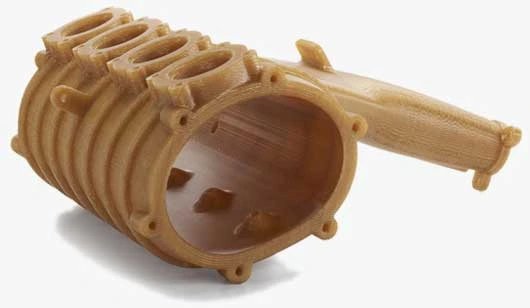
Because of their capacity to print in recognised polymers and composites, FDM printers have an edge in generating sturdy, useable, long-lasting parts.
| Advantages | Disadvantages |
| Comparably cheaper compared to SLA and SLS | Moderate surface finish – ripple effect due to layering |
| Possible to make complex shape parts | Low strength in Z-axis due to layering |
| Thermoplastic resin to prototype parts such as ABS, polycarbonate, or PC/ABS | Limited suitability for functional testing |
Read about FDM here in detail.
Material – ABS, PC-ABS, PC, ASA, Nylon
Multi Jet Fusion (MJF)
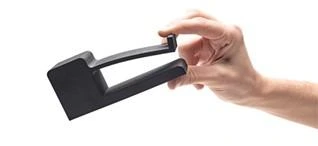
Multi-jet fusion is a powder bed fusion 3D printing technology in which fusing agent bonds powdered material and then heats to fuse them to produce 3D parts. MJF can print highly accurate and durable rigid parts using Nylon PA11, PA12 Nylon and PP. They can also print flexible TPU parts.
| Advantages | Disadvantages |
| One of the fastest 3d printing | Limited material choice |
| No support structure due to powder bed | Surface finish is rougher than SLA and Polyjet |
| Excellent surface finish and mechanical and physical properties | Expensive equipment costs might drive the part cost up |
Binder jetting
Binder jetting is one of 7 additive manufacturing technologies that can produce metal and colour plastic parts. Compared to DMLS, they are very cheap to make metal prototypes. In binder jetting, the binding agent is selectively deposited into a powder bed where it solidifies to create a 3d part.
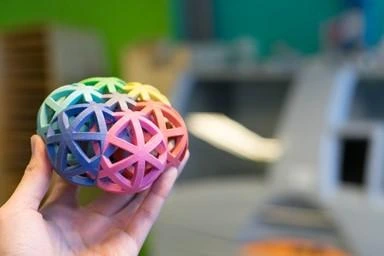
They can be used to prototype full-size assemblies as a model to test user interaction
| Advantages | Disadvantages |
| Comparable cheaper | Rough surface finish |
| Faster process | Not suitable to functional testing to low strength |
| Both metal and plastics are available | Limited material choice |
Poly jetting
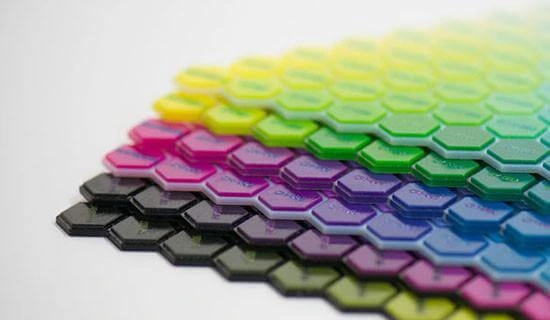
Polyjet is a material jetting technology that produces smooth and accurate parts. The technology uses photopolymer to create parts by jetting onto the build platform and curing them using a UV light.
The surface texture, colour, and different properties are crucial for concept models and full assembly prototypes to test user handling.
| Advantages | Disadvantages |
| Reasonable cost to print | Low strength |
| It can print thin walls and complex geometries | Not suitable for functional parts or testing |
| Both rigid and flex material can be built onto the same part | Not suitable for outdoor use or testing |
Material – General purpose resins – Rigid – opaque and transparent, Flex
More on how Poly jetting works is detailed here
CNC Machining
For parts where its functionality relies on high accuracy and tolerance, CNC machining is still the best prototyping method available. CNC machining is a subtractive manufacturing process in which blocks and rods of metal and engineering plastics are milled and turned to create highly accurate complex parts. There is a wide variety of materials available to cater for any application.
For rapid prototyping CNC parts, consider only the critical features that need machining and break down the parts, so only the critical part of the prototype are machined.
| Advantages | Disadvantages |
| Excellent accuracy and surface finish | Geometry limitations |
| Wide material choice | Expensive due to setting up and tooling cost |
| Higher-strength and suitable for all sorts of functional and environmental testing | Very limited in house capability due to equipment cost |
Read about CNC machining and Aluminium alloys for CNC machining here in detail.
Vacuum casting – Urethane casting
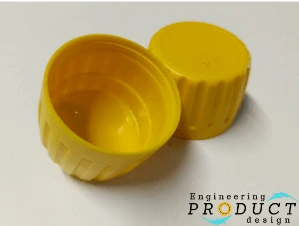
Vacuum casting or Urethane casting uses silicone moulds to make plastic and rubber components under vacuum. They are one of the best processes to rapid prototype injection moulding plastic parts. Therefore, they are ideally suited for small to medium pre-production parts that can be used for functional testing.
Our comparative analysis of Vacuum casting and Injection moulding show that Vacuum casting can be a great prototyping manufacturing process for eventual injection moulding parts.
| Advantages | Disadvantages |
| A wide range of vacuum-casting resins are available | surface finish depends on the post-processing of the part |
| Aluminium and brass in-mould inserts | Thin and thick features may deviate from standard tolerance due to shrinkage |
| create small batches of high-quality injection moulding-type parts for prototype | wears out quickly and generally lasts for about 30 – 50 parts |
Material – Polyurethane resins to mimic rubber, ABS, Acetal, PP and even glass-filled nylon.
Read about Vacuum casting or Urethane casting here in detail.
Investment casting
Investment casting creates parts using wax patterns coated with refractory material to make an expendable mould. Then the wax pattern is melted away before pouring molten metal. Once the metal solidifies within the mould, the foundry breaks the refractory mould to remove the cast parts.
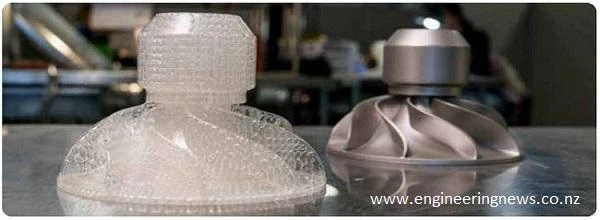
Investment casting is an excellent process to rapid prototype Die casting parts. Investment casting and 3D prototyping techniques such as FDM and SLA produce high precision master patterns with ultra-fine detail and a smooth surface finish.
| Advantages | Disadvantages |
| Possible to cast parts with highly complex shapes and intricate features | Available for metal parts only |
| Excellent dimensional accuracy and tighter tolerances | Parts are difficult to cast if they require cores |
| Excellent surface finish | Costly refractory material and labour cost |
Material options – Although a large selection of metal is available for investment cast prototypes, use Aluminium alloy unless the material is vital for functional testing.
Read about Investment casting here in detail.
Rapid Prototyping Process Selection
5 key factors that should be considered when selecting a rapid prototyping process for NPD are Purpose, Quality, Quantity, Complexity & Cost.
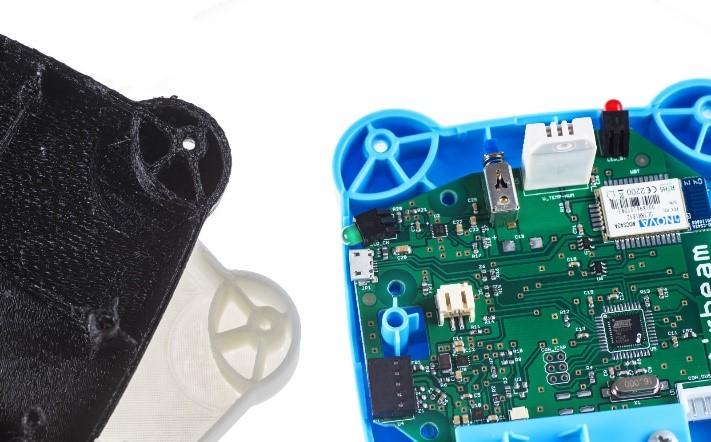
The success or failure of a prototype depends on your selection of rapid prototyping processes for the new product development. There are various ways in which engineering product design prototypes can be made, varying from simple cardboard mock-ups to fully machined metal sub-assemblies.
Prototyping is crucial to any engineering product design, especially new product development. It is the process of making rough models of the product, for instance, to test its functionality, shape, size etc.
This article is about part-based prototypes i.e. how individual parts can be made to create system-level product prototypes.
Prototypes vary in so many ways as each project, product and product design element are different. As the success of any prototype will depend on the selection criteria of prototyping processes, these 5 key factors should be considered at the start of any rapid prototyping process selection.
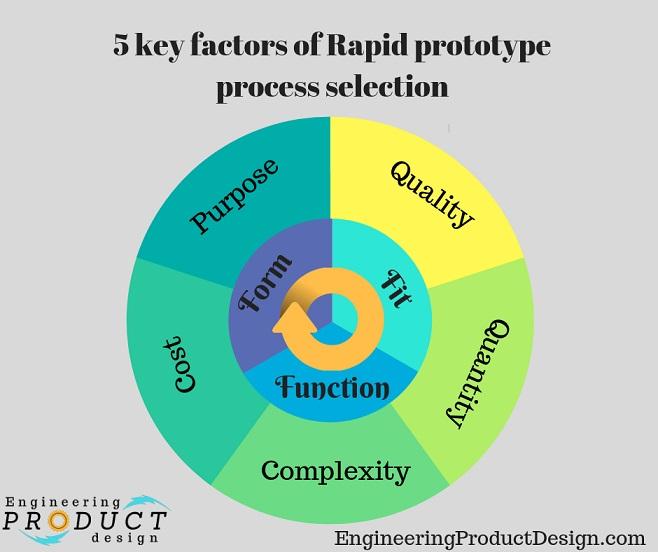
5 key factors to consider when selecting a Rapid Prototyping Process
- Purpose
- Quality
- Quantity
- Complexity
- Budget/cost
Let’s delve into these key factors to understand why they are essential in choosing your next prototyping process.
Purpose
Within an engineering product design and development project, prototypes are created for four purposes, according to Ulrich and Eppinger (2008). They are Learning, Communication, Integration and Milestones. These purposes of the prototyping will vary depending on which of the 4 new product development (NPD) stages you are in. Each stage of the NPD will have its feature and functionality requirement to eliminate risk. This will then define the fidelity type of the prototype required, which is the quality of the prototype discussed later.
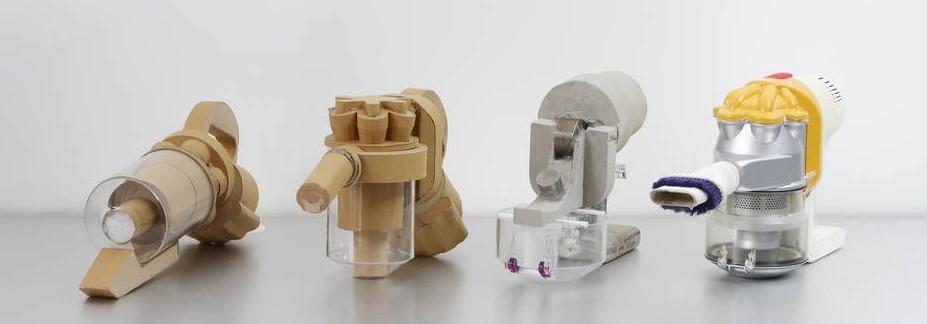
First, it would depend on the planned tests or risk mitigation exercises such as test types, customer interaction feedback etc. If the product would go through rigorous testing, outside deployment and product verification then the material selection would play a key part in the selection of prototyping techniques.
Secondly, any functional aspect you would like on your prototype needs to be considered. Are you planning on functional tests or do you have any moving parts? This will dictate the selection and assembly.
Third, changes and modifications. It’s highly unlikely that your prototype is going to be a success without a few tweaks. So, consider how easy or difficult it would be to modify to get the prototypes working.
NPD stage
Product definition
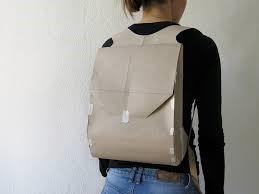
- This stage generally requires very early proof of concept mock-ups, demonstration units and industrial design prototypes
- Prototyping techniques
- CNC machined foam models
- Cardboard mock-ups
- 3D printed parts and assemblies (FDM, SLA, SLS etc)
Conceptual design
- At this stage, you probably need scaled parts or assemblies of the design along with some user interface and limited functionally
- Again, FDM parts are great at getting a feel for the shape and size. If you need more accuracy then you could move into the next level of 3D printing i.e. SLA, SLS and poly jet parts. If the parts are metal, then CNC at this stage is your best bet. In some cases, sheet metal fabrication is also worth considering
Embodiment design
- This is the development phase where you need to explore fully functional (form, fit and function) prototypes, hence details are important. At this stage, it is more than likely that the prototypes are going to be working assemblies containing a lot of parts
- At this stage, you would also need more than one unit for testing purposes, and it is also worth considering the final manufacturing techniques so they could be simulated
- Consider vacuum casting and high-resolution 3D printing such as SLS and SLA for plastic parts
- SLM/DMLS parts are ideal for simulating casting parts (Sand, investment and die casting)
Detailed design
- Any prototype made during this phase is more than likely to be used for functional testing and will also be for pre-production pilot runs
- Injection moulded parts can be prototyped using vacuum casting while machined plastic parts can be 3D printed
Quality
As discussed previously the fidelity or the accuracy of the product required will dictate what type of process and post-processing you would need. The quality of the prototype as compared to your final product or subcomponent also needs to be considered. As high-fidelity prototypes cost more, they should be considered in terms of return on investment.
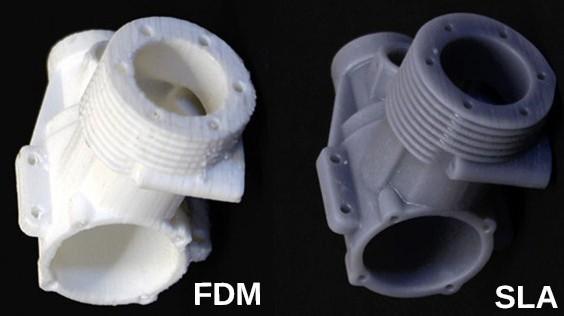
For example, if you have a thread feature on a part then SLA is better than FDM but would cost more.
The life of the prototype is also crucial when deciding the technology. For example, if the parts have fasteners that will be used frequently, then machined or metal inserts are a better option than 3D printed threaded or self-tapping holes.
Material selection also plays a vital role in terms of the quality of the prototype. If the functional elements are linked to special material properties, such as surface finish and durability, then choosing additive manufactured parts might not be the best choice. The general material choices for the different manufacturing methods are as follows:
| 3d printing | CNC machining | Vacuum casting |
| Nylon, PLA, ABS, ULTEM, ASA, TPU | ABS, Nylon, Polycarbonate, PEEK | ABS, Nylon Nylon HT |
| Aluminium, Stainless Steel, Titanium, Inconel | Aluminium, Stainless Steel, Titanium, Brass | N/A |
If the prototype is made of more than one part, then the tolerance of the prototyped parts will have to be considered for ease of integration.
Quantity
The number of required prototype parts are essential in deciding the process as some prototyping technologies are only cost-effective for smaller quantities. For additive manufacturing parts volume also plays a crucial part in costing as bigger parts will require more time to print compared to smaller parts. As a rule of thumb, the following rules apply.
Plastic parts
| Prototype processes | |||
|---|---|---|---|
| Plastic parts | Quantity | ||
| Low (1’s) | Medium (10’s) | ||
| Size | Small | 3D printing | CNC machining (simple) 3D printing (complicated) |
| Large | 3D printing | Vacuum casting CNC machining | |
Metallic parts
| Prototype processes | |||
|---|---|---|---|
| Metallic Parts | Quantity | ||
| Low (1’s) | Medium (10’s) | ||
| Size | Small | CNC machining 3D printing | CNC machining Investment casting |
| Large | CNC machining | CNC machining | |
Complexity
The complexity of the part and intricacy of the features will also dictate the rapid prototype process selection. Additive manufacturing is good for producing very complicated small parts, but one should be cautious about the final design because of complicated means very expensive mass production.
| Process | Tolerance (mm) | Minimum wall thickness (mm) |
|---|---|---|
| FDM | ±0.20 – ±0.50 | 0.8 -1.0 |
| SLS/SLA | ±0.20 – ±0.30 | 0.7 – 1.0 |
| SLM/DMLS | ±0.10 | 0.4 – 0.5 |
| Binder jetting | ±0.20 | 1.5 mm – 2.0 mm |
| CNC * | ±0.012 | 0.5 |
| Vacuum casting | ±0.1 | 0.9 – 1.0 |
Please note that these tolerances and minimum wall thickness are typical values and hugely vary depending on the material choice and feature design.
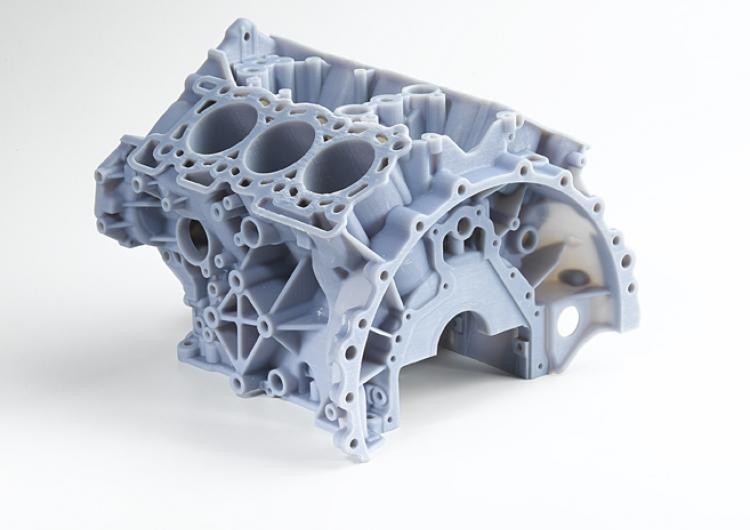
Parts that are eventually produced by injection moulding, various forms of castings can be prototyped using 3D printing while machined parts can be 3d printed or manufactured using conventional forming or subtractive manufacturing processes.
Cost
Finally, the resources available; the objective of the prototype would go hand in hand with the resources available. Time, money and man-hours need to get the prototypes manufactured and working, needs to be considered while choosing the rapid prototyping technology.
Things to ponder:
- Most of the time, time consumed by post-processing or to get the part working from low-quality prototypes will be more than that of high-quality prototypes
- Some processes such as 3D printing might need some post-processing time but it’s relatively quicker and cheaper while a vacuum casting would give parts almost identical to that of injection moulding and can be used without post-processing. However, this will be more expensive with the tooling cost
- The cost of CNC is proportional to the complexity of the part while the cost of AM is directly proportional to the volume and size
- The overall cost would also be tightly linked to the quantities more for a process like CNC because of the higher set-up cost
New engineering product development almost always involves making prototypes to test ideas, functionalities etc. But the quality of your testing and subsequent decision making will highly depend on how well your prototype simulates the final product. So, selecting the right process to make the prototype is crucial to the success of any engineering product.
Once you have a clear understanding of the above 5 key factors, you can decide on the type of process to explore. There are so many ways prototypes can be made, and every prototyping process will have its advantages and limitations. Thus, choosing the correct one is vital to your prototyping success.
Rapid prototyping selection process steps
- Define the purpose of the prototype
- Establish the level of approximation (quality and complexity)
- Outline the evaluation method and plan to identify quantities
- Ensure your cost is kept within your prototype budget